-40%
Digital Engine LCD Tachometer Hour Meter Motor Inductive Gauge 2 & 4 Stroke
$ 5.29
- Description
- Size Guide
Description
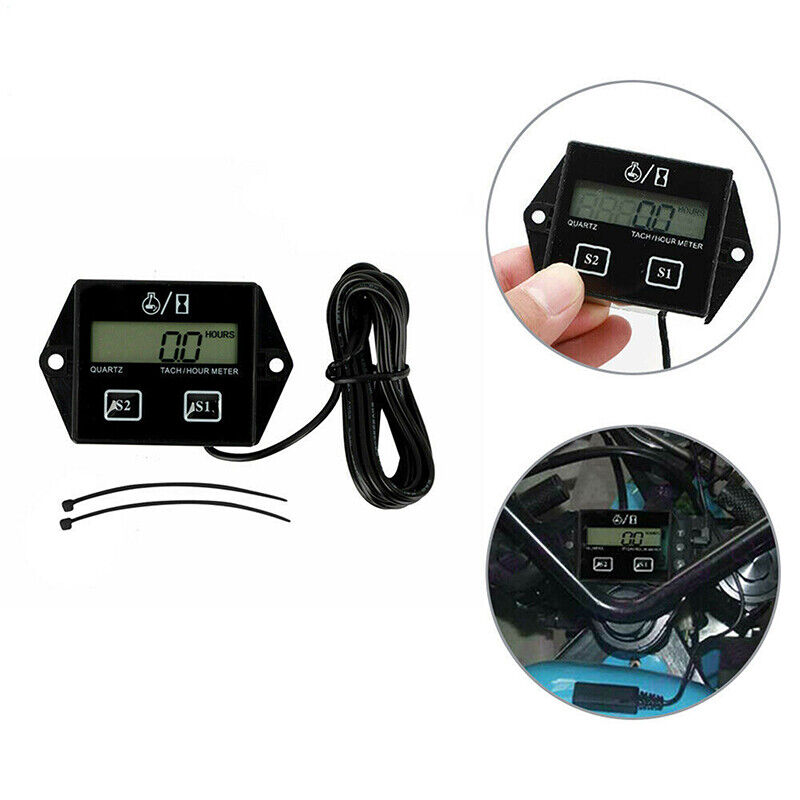
Descriptions:- Brand new and high quality Tachometer / Hour Meter, with large LCD display
- Great for Cart Engines operating in the 25,000 + RPM range
- Work on any 2 or 4 stroke gasoline powered engine.
- With Reset to Zero Hours function, the hour meter reads up to 10000 hours and then resets to Zero & The tachometer can read up to 99,999 RPM
- Programmable Maintenance hour setting with service Icon, a reminder when to change oil or other service
- With wrap black wire around sparkplug wire, can work on all spark ignition engines by selecting engine type using S1 and S2 buttons
- Splash Proof & Easy Installation
Specifications:
Color: Black
Item size: approx. 73*46*20mm
Power supply: 1 * CR2450 batteries (built-in)
The wire length appox 170cm
After the restart, the data will be cleared
Hold down the S1 key until 05 is displayed, release the S1 key, 8-10 seconds after the display back to the total time. Press S1 and S2 at the same time, make the data from 01-09, the system will reset, all the data will be cleared, speed mode defaults to 02.
Package Includes:
1 x Tachometer/Hour Meter
Note:
1. Speed mode setting
Press and hold the S1 button for 4 seconds, the RPM icon will display, and the LCD will display 01 (applicable for 2-stroke engine); 02 (applicable for 4-stroke engine); 03 (other rotations); 04 (only display time, not display speed per minute ).
Once you have found your ideal spark plug ignition method, please release the S1 button, the LCD will flash for 8-10 seconds, and return to the total timing mode; the factory value is 02.
2. Maintenance interval time setting
Press and hold the S2 button for 4 seconds, the number on the right half of the display will flash. And the SERVICE icon will be displayed. Press and hold the S1 button to automatically increase the number of flashing digits. After reaching the desired number, release the S1 button. Press and hold the S2 button for 1 second to add the next digit, and repeat the above steps until the interval time input is completed, unit: hour. Release all the keys, after 14-16 seconds, the LCD display will return to the total time mode.
3. Confirmation of maintenance interval
Press and hold the S1 and S2 buttons at the same time for 4 seconds. After the two numbers increase to 09, it will return to the total time mode. Indicate the maintenance interval time to confirm the start of work. When the service time of the engine start interval reaches 0, the SERVICE icon is displayed, indicating that the service time is up. To make the set interval time work, this step must be confirmed.
4. Query of the set interval time
Press and hold the S2 button for 4 seconds, you can check your maintenance interval time without any settings. If you want to set a new maintenance interval, please repeat steps five and six. That is, if you want to check the maintenance interval time, just press and hold the S2 button.
5. Processing after the service time is up
After the engine is running, if the maintenance interval is up, the SERVICE icon will be displayed to remind the service. Press S1 and S2 at the same time to make the data from 01-09, the SERVICE icon will be turned off, the maintenance interval will automatically restore to the original set time, and continue to run.
6. Only show the time
Press and hold the S1 button until 04 is displayed, then release the S1 button. After 8-10 seconds, the display returns to the total time. When the engine is running, the display will only display the time, not the speed, and the HOURS icon will flash.
7. System reset
Press and hold the S1 button until 05 is displayed, release the S1 button, and the display will return to the total time after 8-10 seconds. Press the S1 and S2 keys at the same time to make the data from 01-09, the system will reset, all the data will be cleared, and the display will turn off. The default speed mode is 02.

